Best House Painting Tips To Attract Everyone’s Eyes
Whether a house is recently built or a house has not been renovated for a very long time, those houses don't show the feeling of safety and peace much until the house is painted. So how to paint my house? Looking for house painting images? Many years ago, when colors were not much understood by many peoples, people were living in the black and white age. From the time when colors started being noticed by everyone, many things changed and these days colors have shown that they do affect people’s conscious minds in both positive and negative ways. In anyone’s room if colors are not used with proper thoughts then he/she might get mood swings anytime and the mood swings can’t be said that they would always be in a good way. It is scientifically proven that if colors which represent peace and harmony are used all around a person’s life then whether he/she knows the meaning of colors or not, he/she will automatically become peaceful from mind and harmonious through heart.
So it is best for anyone’s happiness and peacefulness of mind if they use the correct color combination which gives joy to the person’s inner soul. It is also said that the surrounding, which is decorated by a knowledgeable person who knows a lot about colors and their combinations, will have a peaceful and friendly environment most of the time. For this to happen almost everyone has to think about their own surroundings, rooms and houses in which they are living. If you are planning on painting your house now after reading our thoughts then you must also know of some very basic but useful tips which would make your work less time consuming and less money investing. Sure painting a house is kind of intimidating somehow but with the right skills and procedures it can be the best thing to excel anyone’s artistic image.
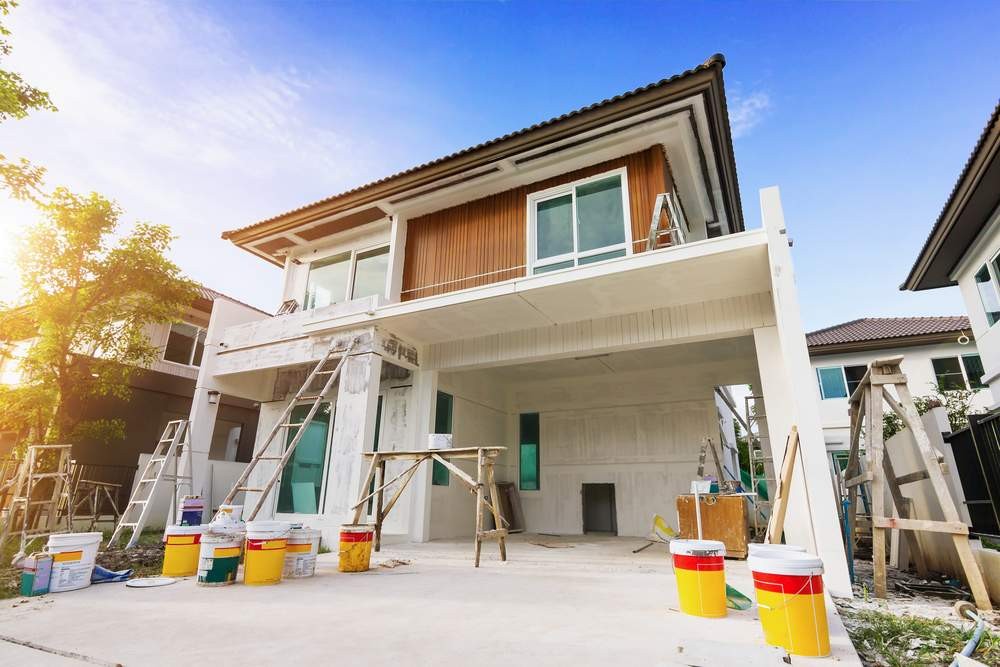
And since a house can be the biggest investment in anyone’s life, it is very beneficial to maintain the dignity of the house. First thing first, everyone needs to know that painting of any building or residential spot is done in two ways; exterior way and interior way. It doesn’t matter much from which one to start first. However it depends on the season. If it is the season of spring then we would recommend you to do the exterior painting first because the weather in spring helps the paint to settle quickly and effectively.
Best House Painting Tips
1) Exterior Painting
a) Power Wash and Removal of Loose Paints
Power wash and removal of loose paints is one of the important exterior house painting techniques. Either the house is recently built or it is a very old one, both have many rough surfaces which get in the way of plain and proper painting. The old houses especially have many places from where the paint has loosen its shine and started to cut off from the surface of the wall. If they are not properly removed before covering up the house with new paint then the old remains of the previous layer of paint might start to rot and crack to the new layer even though a long time might have not passed.
One should start by power washing to every single corner and designing curves to blast off the dirt, loose paint and grime. This will give the new layer of paint to cover every tiny place nicely and last for a longer time. It would be best if after the power wash the house is left to dry up for at least 2 days in nice weather as I have mentioned before like the weather of spring.
b) Maintaining the space for the paint
After the strong power wash, many small holes or damps seems to appear at many places and also when some small sprout of plants have grown in unnecessary way then after removing them it is sure that small amount of the coating of the surface is also removed along with that which is need to be filled with some potting or any material which would make the filing look exactly same as newly made house before placing new layer of paint on that place in order to make it look beautiful. It would be nicer if the individual also covers up the windows, shrubbery and other things upon which you don’t want the paint to be sprayed or brushed. The idea of spray painting inside of house is also quite cool.
c) It time to now decide the color to be put
It won’t be good if we realize later that the recently painted color doesn’t look the way we wanted the house to be after being painted. So to avoid that many professionals advise people to use a small amount of paint on some cardboard while keeping the cardboard at the position where we want to spray the paint to visualize whether the paint is going to look just as fine as we want it to look like.
Along with all of this, we have to take a few things into consideration about the equipment we are using during painting and their settings. It is recommended to use it once as a trial at some place which does not require much of anyone’s attention. Why? Because if the spray is spraying the paint at a very fast speed then the worker has to move their hands in fast speed too. Since if at one place too much of the paint is sprayed then it may leave a heavy spot.
d) Painting the eaves and trims
While using a sprayer to spray eaves and trims, any professional will first make the setting of 313 or 413 spray tip which would make the sprayer spray less and narrow the pattern of diffusion of the paint which would help in doing work which requires very high precision. For trim, that can mean up and down for some boards and side-to-side for others. While working with the sprayer outside at the exterior, the speed should also be regularly observed because if the wind is blowing too fast then it might disturb the trajectory of the paint on which we want it to work and might paint the things which we don’t want to be painted. At that point, the work should have to be paused until the wind gets back to a peaceful state.
e) Now covering up all the other parts
After the painting of the trim is over, the work is to be stopped till it is fully dry, then it is masked off with painter’s tape and plastic sheeting. After testing the spray on a cardboard for the perfect pressure setting with which we are comfortable, the work should be started from the top of the house to the bottom. If a ladder is being used, spray the sections as wide as anyone within safe reach but try not to let a section dry before painting the next section or there might be a heavy spot left.
Point the spray gun up at an angle towards the bottom of each row, if we get any drips while spraying then we can use a paint brush to level them up. In situations where precision is very important to take into consideration, we can use paint shields to avoid over spray.
f) The last attempt to make the paint last longer
After working for some day to have a nice and shining look of our own house, the best final step will be to apply a protective layer against elements like dirt, dust, rain, etc. By doing this we can save a lot of money and can have the experience of joy and pride while looking at our own painted house.
2) Interior Painting
a) Uses of tack cloth
Tack cloths are inexpensive painting tools which clean the surface prior to painting or staining for flawless results. Tack clothes like beeswax-impregnated cheesecloth, can easily pull off sawdust, wood shaving, and all manner of disturbance creating stuff however it should also be in consideration that they shouldn’t be hardly pressed. However if we don’t have any tack cloths then we may use damp cloths but we have to make sure that the cloth is squeezed nicely before using them. Tack cloths are more suitable for trim, doors and cabinets than for walls and ceiling.
b) High quality roller covers and brushes are more preferred
Low quality roller covers usually leave fuzz and lint which are embedded in the paint and when the paint subsequently dries we may be left with bumpy walls. Low quality brushes leave streaky brush marks however the high quality brushes don't. Low quality brushes are generally used for applying glues, adhesives and solvents. So for better finishing of the paints high quality brushes are best. Remember this!! We are talking about high quality brushes, not highly costly or expensive brushes.
c) Shine of high quality brush
We may have many times seen the different costs of similar looking paints. Ever thought why is that? We are not saying that all expensive paints are good but we are saying that those paints which have a long lasting appearance and a nice shining look to it will usually have a high cost. We can only touch and then only can feel the difference in them. If you want to have a long lasting appearance then it’s better to have high quality paint only after full inspection.
d) Testing paint quality with duct tape
There are several questions regarding the quality of paints. The most important one is how to identify the quality. Well we have a simple but effective way to know about that. We can use duct tape. Lay a strip of fresh duct tape over the surface in question, then rip it off. If flakes of paint more than microscopic size come off, you may need to scrape and then sand.
e) Gloves to avoid paint
Many people don’t think about it too much. Some even doesn’t one. Well if you are health conscious then you must also know about the bad influence of paint on our skin then you might wanna avoid that and might use a glove so let me recommend you the best gloves would be the one with latex covering but if you are allergic to it then use a similar type of glove made up of material like nitrile.
i) Uses of painter’s tape
The blue colored tapes are also called painter's tape which are usually low-sticky and very useful during painting works. We can apply the blue tape as like fixing a limit or boundaries upto which we have to paint. It is useful while painting around junctions between walls and ceilings.
ii) Avoiding overlapping marks
Overlapping marks never look good with paints unless if anyone is using flat or matte paint, there is virtually no danger of creating overlap marks. The glossier the paint, the more prone it will be to showing overlap marks. While semi-gloss and glossy paint, in particular, demand strict attention be paid to maintaining a wet edge.
iii) Masking film to cover clean areas
Masking films are professionally used generally because not many people know of it. Since they don’t require any duct tape or anything like that to stick to any surface. They have static electricity to attach to any surface and are used for covering the stuff which the individual doesn’t want to be painted. Thin sheets of such masking film are used at the walls and windows and thick ones are used to cover the furniture and mattress.
iv) The last task of cleaning
After all the day of painting, many people just want to avoid the cleaning work but can’t just ignore the paint attached to the rollers and brushes since they need to be used again. Well for brushes, many painters use the paint comb to clean it. There are some other secrets behind cleaning all the painting equipment. Two of which are mentioned here:-
- Freezing Them:
Wrap the brush or roller in a plastic bag and put them in the freezer. This should preserve the brush or roller indefinitely. Allow plenty of time for the roller cover or brush to thaw before you attempt to paint with them again.
-
Wrapping Only:
If you dislike the idea of putting brushes or roller covers in a food zone, you can still wrap them in plastic and keep them outside at room temperature. Just make sure that the plastic is airtight. This should preserve the brush or roller cover for the rest of the day. You might even be able to push it to the following day if the wrap is very tight.
You May also want to Check out
1. Electrician Service in Kathmandu Valley
2. Inverter / UPS Repair in Kathmandu Valley
3. Bathroom Renovation Service in Kathmandu Valley
4. Plumbing Service in Kathmandu Valley


